As I mentioned in my last port, I received Dev Alpha B device as part of Port-A-Thon event from BlackBerry.
Here is unboxing snaps of Dev Alpha B device.
Device has hardware key to capture photo, increase decrease volume. Other side there is micro USB connection for data transfer and charging. It also support mico HDMI for TV Out.
On top there is Power button and Audion jack.
In box, it comes with Battery, USB port and charger.
Inside there is slot for micro SD card and SIM card.
I received BlackBerry playbook as reward of Port-A-Thon developer event from BlackBerry.
Here is unboxing snaps of PlayBook. I got 32GB version of it.
It comes with nice protective pouch, USB cable and Power cord.
It can play high definition video quite smoothly. It also pre-loded with Need for Speed game.
It has micro usb connector for data transfer and power charging. It also has micro HDMI for TV Out.
I think it browser is quite power full. It support multiple tab and quite intuitive way to switch between the tabs. And as you can see it can show flash content quite well. You tube movie and player from other live streaming service was playing smoothly with browser.
Recently BlackBerry hosted Port-A-Thon event. Event was about porting apps to new BB10 platform. Based on number of Apps ported they will provide appropriate rewards.
I also took part in this event, I ported my Meego based Qt application to BB10 device and I was rewarded with BB10 Dev Aplha B device and a BlackBerry Playbook.
Its quite encouraging how BlackBerry is providing developer support and hosting various event. Its helps both BlackBerry and developers.
Following are few snaps, I will create another post for unboxing for Playbook and Dev Alpha
I was trying to search a nice screen capture application for BB10 Dev Alpha device.
I could not find any such application.
But after searching blackberry support forum for a while. I found that there is quite a easy way to take screen shot.
On Dev Alpha device if you press the Volume Up and Volume Down buttons at the same time. It will take a screen shot of whatever currently displayed on screen.
I recently got BB10 Dev Aplha Device to port my Harmattan Qt application to BB10 device.
I started with porting my audiobook reader application. Cascades QML components are quite similar to Harmattan QML components. Thought it requires some effort to port from Harmattan to Cascade.
I will post about my porting effort in this post and following posts.
In this post I will write about how to create simple Dialog box using Cascade QML component.
My final dialog looks like below.
For creating dialog you need to extend Dialog component. I added signal to indicate action from dialog to other component.
I think code does not required much explanation so following is code for creating and calling the dialog.
To use this dialog you can use following code. To open dialog, i created openDialog() function. Function used dlgDef, ComponentDefinition to create dialog object at runtime.
You also need to connection signal from dialog to function defined in current page, which is calling this function, like this.
dialog.sampleSignal.connect( page.dialogClosed );
    property Dialog dialog;
    function openDialog() {
        if ( !dialog ) {
            dialog = dlgDef.createObject();
            //connecting signal to function
            dialog.sampleSignal.connect( page.dialogClosed );
        }
        dialog.open();
    }
Dialog definition and function which will be invoked on signal can be defined like below.
            attachedObjects: [
                ComponentDefinition {
                    id: dlgDef;
                    source: "Dialog.qml";
         }
     ]


 function dialogClosed(text) {
     console.debug("Dialog closed do something");
 }
That's all. Its quite easy to create custom dialog with Cascade QML.
I recently ported my iPhone app to iPhone5. I required to change quite a few things. Porting experience was not that much smooth as I was expecting.
In this post I am listing what all changes I made to make my universal app iPhone5 compatible.
Enable iPhone5 support
If you have not done anything to your application for iPhone5 support, it should work fine but your app will be launched in letterbox mode. I mean you will see black area around your app.
If you want to remove those black bar and want to use whole iPhone5 screen then you need to supply iPhone5 specific launch image. Image name should be Default-568h@2x.png and resolution should be 640x1136.
When you supply this image, iOS6 knows that your app is iPhone5 resolution compatible.
You can supply that image using project screen.
Once this is done your application will be able to use whole screen area.
You will also need to create other background image with above resolution, however they will not be used by default. You will need to load and display them manually.
Detecting iPhone5
While porting we will need to detect if phone is iPhone5 or not. I am using following code for detecting iPhone5.
Changes in App Delegate
There are some changes in iOS6 to handle orientation change.
In your app delegate class you need to use UIWindow's setRootViewController api to set view controller, rather than using addSubview
Now my applicationDidFinishLauncing method looks like following. I also required to create UIWindow instance manually else touch event was not working properly.
       initWithNibName:@"ViewController" bundle:nil];

    if ( [[UIDevice currentDevice].systemVersion floatValue] < 6.0)
    {
        // for older version
        [window addSubview: viewController.view];
    }
    else
    {
        // use this method on ios6
        [window setRootViewController:viewController];
    }
    [window makeKeyAndVisible];
}
Handling Orientations
Api to detect orientation change is also changed in iOS6. shouldAutorotateToInterfaceOrientation method is replaced by supportedInterfaceOrientations and shouldAutorotate in iOS6.
I left implementation of shouldAutorotateToInterfaceOrientation method as it is as those will be used for old platform.
Following is how I handled the orientation change.
// For old version
- (BOOL)shouldAutorotateToInterfaceOrientation:
My application is universal application and I have different nib file for iphone and ipad. There are many view for my application and each view has background and different layout.
For iPhone5, you either have to create separate nib file to handle iphone5 specific layout and background image. Or you can go ahead with auto layout but this will work only for iOS6 and onwards.
I wanted to support old platform in the same code base so I ended up creating separate nib file for iPhone5 and specified iphone5 specific background and layout manually.
I am using following code for loading different nib file according to platform.
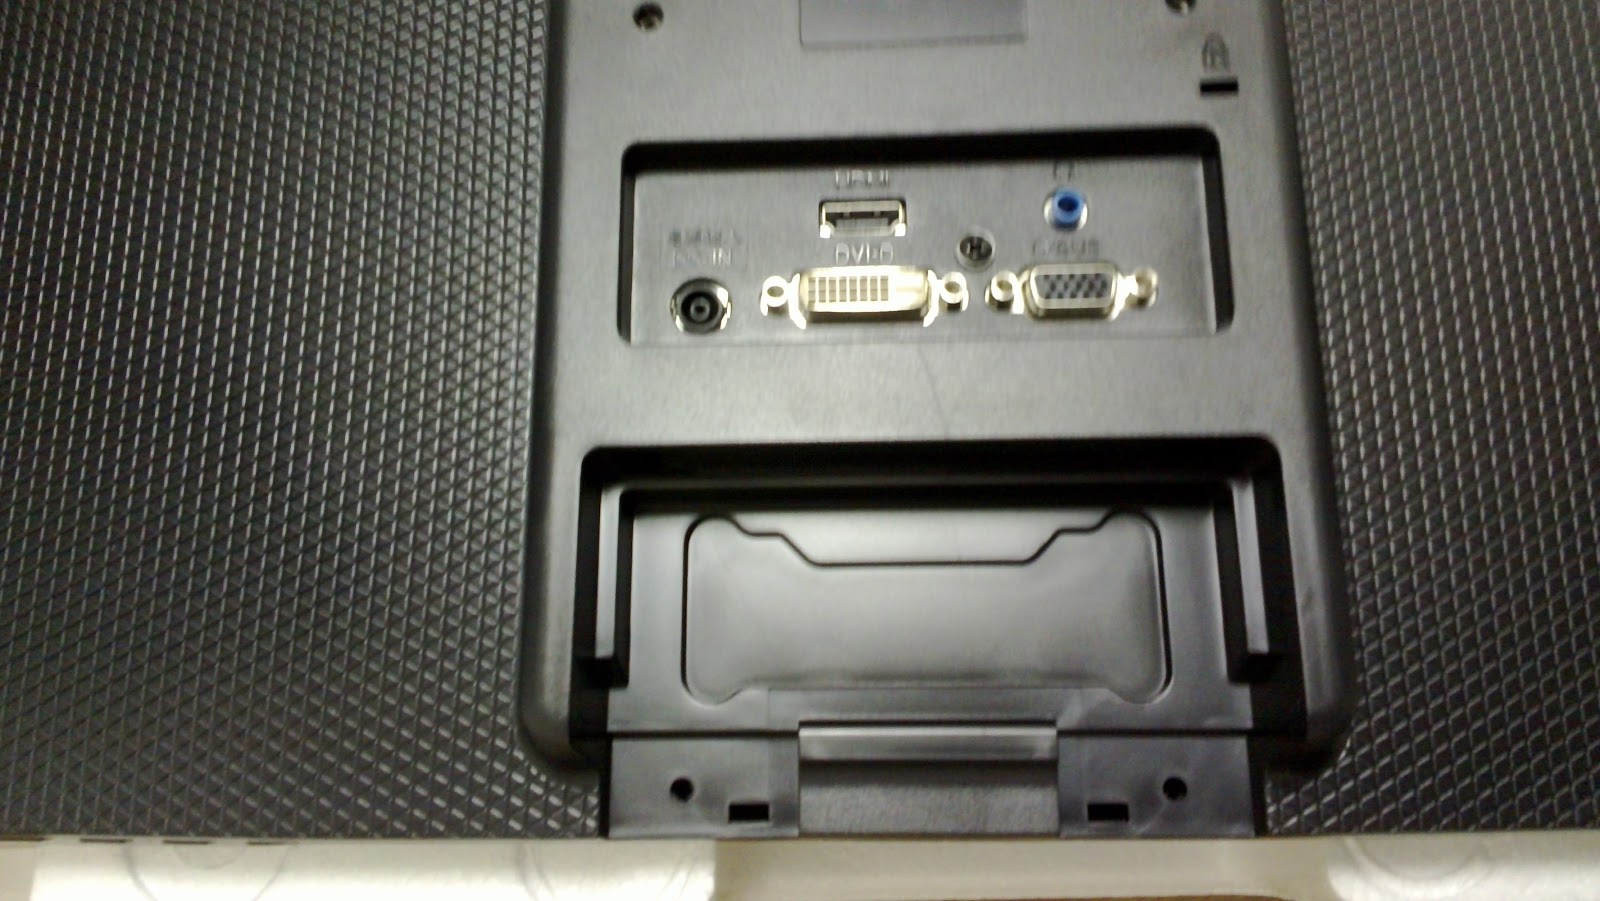
I just received LG Flatron E2742 27 inch LED monitor.
Following are few snapshot of it and my impression regarding the same.
Monitor comes with DVI, VGA cable plus driver installation disc and stand for monitor I also got HDMI cable from online vendor as gift. And yes monitor support all three input VGA, HDMI and DVI. There is also sound output connection. I never tried it looks like it will provide sound output form HDMI.
Assembling the stand and mounting the monitor on stand is quite easy and quite well explained in manual as well. However you will not need to refer it, process is quite intuitive.
Monitor vary slim and bezel is also very thin and its non glossy as well so eyes does not get much strain due to constant reflection. You can adjust it tilt angle but you can not adjust its height.
Once setup I mounted and connected with my laptop using VGA cable. Both my windows and ubuntu laptop detected required driver by itself. I did not required to do any setup my self.
Monitor maximum supported resolution is 1920 x 1080 and my both laptop are able to support his resolution.
On Ubuntu at start up time or at log on time sometimes this monitor does not get started in 1920x1080 resolution I have select this resolution manually from display setting.
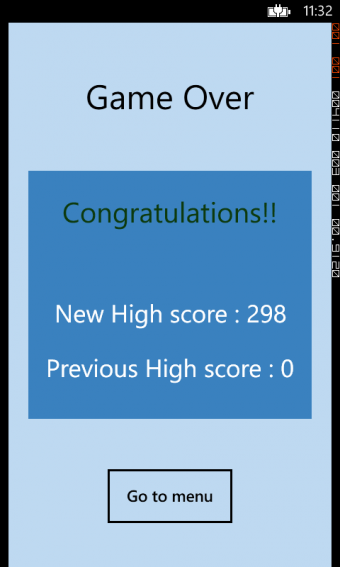
I created a article for Forum Nokia. Article is How to guide for creating a vary simple game using Visual C# and XAML for Windows Phone.
I am still learning WP development so content is vary basic. I am also planning to publish this game vary soon on Windows phone store.
Please find the article here. Article shows How to create basic menu screen, How to achieve navigation between different screen, how to use XAML to create geometry, How to achieve opacity animation, How to change image dynamically and How to use isolated storage for persistence.
Recently BB10 device is getting in to news for its Qt framework support. I got curious about it and decided to port my Harmattan Qt app to BB10 device. First of all I am glad that finally there will be a real main stream device that will support Qt as development framework.
After installing BB10 NDK and going through few sample application I realized that I need to create BlackBerry Cascades C++ project using its QNX Momentics IDE event though I just wanted to create plain Qt application. So I created the Cascades C++ project and merged my existing Qt App's code to BB10 project.
I was aware that in order to run the application I need to change Harmattan component used in QML to standard QML component but I wanted to check debugging support provided by Momentics IDE to debug Qt cpp code and QML code. So I started application and I was staring at while screen with no error message in console of IDE and seems like there is no support to debug QML code or Java script code.
I added few debug message to identify problem but still did not see any message in console. I still don't know how to see those debug log from Qt app in BB10. I think there must be some installation problem.
In addition to this debug log problem, Its emulator is not working in normal mode on my HP Elitebook 6930p laptop with Ubuntu as OS. I always have to run it in safe mode. While running it in Safe mode, I faced another major problem. The emulator spill out of my laptop's 15 inch screen. Default emulator resolution is so big, I have to scroll a lot to see the whole screen of device. It seems that controller utility provided with emulator is not supposed to work when emulator is running in safe mode. This is so discouraging. However I decided continue my porting effort.
So no debug log and huge emulator that my 15 inch laptop can not contain, I decided to first try to run my application using Qt Desktop version and once application is working fine on desktop Qt SDK. I merged my code back to BB10 project.
I needed to make some minor change relate to path before I can see anything running. In BB10, Qt application locate images and QML file in assets folder not from Qt's Resource file. So I made necessary changes to use Image and QML file from Assets folder. Actually you can specify where your image files and QML files are present in bar-descriptor.xml but I am using default assets folder only.
Following is how you can show QML file located in assets folder using QDeclarativeView.
So after this I was able to see my application in emulator. But my application was supported in landscape mode only so I need to make change to make it launch in landscape mode only. To make application support either Portrait or Landscape mode, you need to set aspectRatio tag in bar-descriptor.xml, and to disable auto orientation change you can set autoorients tag to false
Following is my entry into bar-descriptor.xml
So now my plain Qt Application is running fine in emulator, but my application keeps running even after its minimized. I realized that I need to capture BPS Event in order to detect application minimize and maximize event. I found good information here for this purpose.
Following is my code to detect application minimize event so I can pause my application.
static QAbstractEventDispatcher::EventFilter previousEventFilter = 0;

static bool bpsEventFilter(void *message)
{
    bps_event_t * const event = static_cast<bps_event_t>(message);

    if (event && bps_event_get_domain(event) == navigator_get_domain()) {
        const int id = bps_event_get_code(event);

		//unsigned int code = bps_event_get_code(event);
		switch ( id ) {

		case NAVIGATOR_WINDOW_INACTIVE:
		   qDebug() << "INFO: Window inactive";
		   break;

		case NAVIGATOR_WINDOW_ACTIVE:
		   qDebug() << "INFO: Window active";
		   break;

		case NAVIGATOR_WINDOW_STATE:
		   navigator_window_state_t state = navigator_event_get_window_state(event);
		   if (state == NAVIGATOR_WINDOW_FULLSCREEN) {
			   qDebug() << "INFO: Resume game";
		   } else {
			   qDebug() << "INFO: Pause game";
			   Utils::instance()->PauseGame();
		   }
		   break;
		}
    }

    if (previousEventFilter)
        return previousEventFilter(message);
    else
        return false;
}
This is how you add event handler in main function.
So After all this my porting activity is almost complete. Now I need to learn how to submit application to BB10 store. Let's see how that goes. So overall I feel BB10 provides nice Qt support for app development, emulator support needs to be improved though to be considered as useful ( at lest in my case).
In past sometime I was working on project for which I required to create algorithm based on backtracking. For learning purpose I thought to create first a sample program using backtracking to create skeleton code.
I created a program to solve 8 queen puzzle as sample. You can find more information about 8 queen puzzle here.
Following is my code and below is main function which invoke the algorithm.
Recently while browsing and I found one interesting question to reverse the digit of given integer. I thought to solve the same.
Solution is quite simple then I initially thought. Following is my solution.
    int origNum = 12304;
    int reverseNum = 0;

    while( origNum != 0) {
        int lastDigit = origNum % 10;
        origNum /= 10;
        reverseNum = reverseNum * 10;
        reverseNum = reverseNum + lastDigit;
    }

    printf("reverse number %d", reverseNum);
Past some time I was working on update of my application Crazy Chickens for N9.
In new version, Game character recognizes gesture based on user motion and move his bucket accordingly to catch egg. Game uses the phone back camera to capture image and recognizes gesture by tracking motion of some predefined colored object, which user is holding and moving to move the character. Hope you will enjoy the new update.
There also some minor update in UI and game logic to make game more enjoyable.
Game need some setup before you play the game, You will need to connect phone to TV using TV out cable and place phone such that it back camera faces you. Game can recognized four color, Red, Blue, Yellow and Green. You need to choose one color and hold that colored object in hand. To move character to put bucket under hen, you need to move colored object in direction of hand.
Please also make sure that you are fully visible and color object's movement does not go out of camera frame. Also make sure that there is enough light in room else game might has problem recognizing color clearly.
If you don't have TV out cable then you can install VNC server on Phone and connect it from PC to project phone's screen on PC.
Hope you will like the update. Please let me know if you have any feedback. I will try to update game with your feedback.
Long time ago, I posted implementation of Priority Queue implemented using Qt's
QQueue data structure. Here is old post.
That code was offering o(n) performance for enqueue operation and o(1) performance for dequeue operation. This might be acceptable for small data set. But for large data set you might want to use Priority queue based on Binary heap implementation.
I tried to implement my old priority queue using Binary heap, here is my implementation.
Following code implements BinaryHeap using QList. BinaryHeap class implements enqueue, dequeue and count method.
template <class T>
class BinaryHeap {
public:

    void enqueue(T item) {
        mList.append(item);
        int i = mList.count() - 1;
        int parent = (i-1)/2;
        while( parent >= 0 && mList[i] < mList[parent] ) {
            T temp = mList[parent];
            mList[parent] = mList[i];
            mList[i] = temp;
            i = parent;
            parent = (i-1)/2;
        }
    }

    T dequeue() {
        if( mList.isEmpty()) {
            return T();
        }

        T item = mList[0];
        int i = 0;
        mList[0] = mList[ count()-1];
        mList.removeLast();
        while( i < count() ) {
            int left = 2*i+1;
            int right = left + 1;

            if( right > count() - 1) {
                break;
            }

            int min = left;
            if( mList[right] < mList[left] ) {
                min = right;
            }

            if( mList[i] > mList[min] ) {
                T data = mList[min];
                mList[min] = mList[i];
                mList[i] = data;
                i = min;
            } else {
                break;
            }
        }
        return item;
    }

    int count() const {
        return mList.count();
    }

private:
    QList<T> mList;
};
And based on above BinaryHeap class, following is my PriorityQueue class.
enum Priority {
    Low = 2,
    Normal = 1,
    High = 0
};

template <class T>
class PriorityQueue
{
public:
    void enqueue( Priority priority, T data) {
        Item item(priority,data);
        mHeap.enqueue(item);
    }

    T dequeue() {
        Item item =  mHeap.dequeue();
        return item.mData;
    }

    int count() const {
        return mHeap.count();
    }

private:

    BinaryHeap<Item> mHeap;
};
And Item class looks like below.
    class Item{
    public:
        Item() {
        }

        Item(Priority priority, T data ):
            mPriority(priority),mData(data)
        {}

        bool operator<(const Item& other) {
            return mPriority < other.mPriority;
        }

        Priority mPriority;
        T mData;
    };
In this blog post I have written how we can access the individual frame from QCamera, In this blog post I will show how to use those frame to track some particular colored object and detecting gesture from motion of that object.
Following is demo of my sample application running on N9.
Tracking colored object
I don't know the actual algorithm for detecting color in image but i created simple algorithm that will detects some predefined color in image. Please note that if image has multiple object with the color which we are tracking it will return rectangle which cover all objects, not individual rectangle of each object.
As I am not interested in details of captured image, just interested in checking if image has defined color object or not, I reduces size of image to half, so i have to process small number of pixel to detect color.
Then to detect color in image, I convert image capture from camera from RGB color spec to HSV color spec, as its quite easy to process HSV color spec to detect color.
After image is converted to HSV color spec, I converted image to black and white image, black portion will be detected object and rest of things will be in white. After getting this image I just need to scan image to find area of black portion of image.
So now I have coordinate of colored object which we are detecting.
Following code implements the above logic to detect the red colored object, in code I combined process of converting image to black and white and detect the black portion of image.
QRect ColorMotionDetector::detectColor( const QImage& origImage)
{
    //reduce size of image
    QImage image(origImage);
    image = image.scaled(QSize(320,240));

    emit originalImage(image);

    //rectanlge of detected colored object
    int maxX = -1;
    int minX = 99999;
    int maxY = -1;
    int minY =  99999;

    int width = image.width();
    int height = image.height();
    bool detected = false;

    //black and white image
    QImage converted(image.size(),image.format());

    for (int y = 0; y< height; ++y ) {
        for( int x = 0; x < width; ++x ) {
            //convert individual pixel to HSV from RGB
            QRgb pixel = image.pixel(x,y);
            QColor color(pixel);
            color = color.toHsv();


            //default whitel color for other object
            QRgb newPixel = qRgb(255, 255, 255);

            //detecting red color
            if( color.hue() >= 0 && color.hue() <= 22
                    && color.saturation() <= 255 && color.saturation() >= 240
                    && color.value() <= 255 && color.value() >= 100 ) {

                detected = true;

                if( x > maxX ) {
                    maxX = x;
                } else if( x < minX )  {
                    minX = x;
                }

                if( y > maxY ) {
                    maxY = y;
                } else if( x < minY )  {
                    minY = y;
                }

                //black color for detected object
                newPixel = qRgb(0, 0, 0);
            }
            converted.setPixel(x,y,newPixel);
        }
    }

    QRect rect;
    if( detected) {
        rect = QRect(minX,minY, maxX - minX, maxY-minY );

        //drawing red rectangle around detected object
        QPainter painter( &converted );
        painter.setPen(QPen(Qt::red));
        painter.drawRect(rect);
        painter.end();
    }
    emit processedImage(converted);

    return rect;
}
Detecting swipe gesture
When we detect the position of object using above color detection code, we can use that position to detect if position tracked from individual image create some kind of gesture.
I will show how to use captured position to detect horizontal swipe gesture, we can easily extend it to detect vertical swipe or diagonal swipe.
I used following logic to detect swipe gesture,
> As color detection code returns position of tracked object, We compare this new position with its old position.
> If there is any progress in motion of object, we add difference of x coordinate to total progress made. In case of no progress, we discard whole gesture and reset variable that keep track of motion.
> While doing so if we detect certain amount of movement in particular direction, we decide if gesture was left swipe or right swipe using difference in position of object and reset the variables.
Following code implement above logic.
Gesture ColorMotionDetector::detectGesture(QRect rect) {

    //not valid rectangle, mean no object detected
    if( !rect.isValid()) {
        mLastRect = QRect();
        mXDist = 0;
        return Invalid;
    }

    //there is no previous cordinate, store rect
    if( !mLastRect.isValid() ) {
        mLastRect = rect;
        mXDist= 0;
        return Invalid;
    }

    Gesture gesture = Invalid;
    int x = rect.x();
    int lastX = mLastRect.x();
    int diff = lastX - x;

    mLastRect = rect;
    //check if there is certain amount of movement
    if( qAbs( diff ) > 10 ) {
        //there is movement in x direction, store amout of movement in total movement
        mXDist += diff;

        //x motion match to amount required for perticular gesture
        //check if motion of let to right or right to left
        if( mXDist >  150 ) {
            qDebug() << "Right horizontal swipe detected..." << mXDist;
            mXDist = 0;
            gesture = SwipeRight;
        } else if ( mXDist < -150 ) {
            qDebug() << "Left horizontal swipe detected..." << mXDist;
            mXDist = 0;
            gesture = SwipeLeft;
        }
    } else {
        //discard the gesture
        mXDist = 0;
        mLastRect = QRect();
    }
    return gesture;
}
Putting all together
Now we have code that detect colored object and code that detect gesture. Following code shows how those function are used together.
//detection motion from captured image from camera
void ColorMotionDetector::detectMotion( const QImage& image) {

    QRect rect = detectColor( image);
    Gesture gesture = detectGesture( rect );

    if( gesture != Invalid ) {
        emit gestureDetected( gesture );
    }
}
Following is vary simple gesture handler, which just print handled gesture.
Generally I don't use windows, but at work I need to use windows sometime and on windows I required to create one utility application, which can be activated by hotkey like, Alt + Tab.
There is RegisterHotKey windows API, by calling it we can register special key combination as Hot Key. By winEvent event handler, we can respond to Hot Key event.
Following is my code, that register CTRL+SHIT+SPACE as Hot key and responds it in winEvent handler.
Some time back I wrote blog post about how to Post message on facebook wall, Here is link.
This post I will show how to upload a photo from local machine to facebook. On facebook photo can be uploaded to application's album or existing album created by user or application.
Where photo will be uploaded is decided by URL used during http requst.
https://graph.facebook.com/USER_ID/photos will upload photo to application's album, https://graph.facebook.com/ALBUM_ID/photos will upload photo to specific album indicated by ALBUM_ID.
My code describe method to upload photo to application's album. You can visit this post to know how to login and how to post message on facebook wall.
This post describe process how to upload photo using php, I tried to convert that code to Qt code. As code shows that photo is uploaded using multipart/form-data method, we need to create post request with multipart/form-data method.
Following code describe the process.
void FacebookHelper::uploadPicture(const QString& picLocation,
    const QString& comment) {
    if( !isAuthorized() ) {
        qDebug() << "Please login first...";
        emit messageStatus(1,"Please login first...");
        return;
    }

   // Show photo upload form to user and post to the Graph URL
    QString uploadUrl = "https://graph.facebook.com/me/photos?access_token="
       + mAccessToken;

    QFileInfo fileInfo(picLocation);
    QFile file(picLocation);
    if (!file.open(QIODevice::ReadWrite)) {
        qDebug() << "Can not open file:" << picLocation;
        emit messageStatus(2,"Could not open file" + picLocation);
        return;
    }

    QString bound="---------------------------723690991551375881941828858";
    QByteArray data(QString("--"+bound+"\r\n").toAscii());
    data += "Content-Disposition: form-data; name=\"action\"\r\n\r\n";
    data += "\r\n";
    data += QString("--" + bound + "\r\n").toAscii();
    data += "Content-Disposition: form-data; name=\"source\"; filename=\""
             +file.fileName()+"\"\r\n";
    data += "Content-Type: image/"+fileInfo.suffix().toLower()+"\r\n\r\n";
    data += file.readAll();
    data += "\r\n";
    data += QString("--" + bound + "\r\n").toAscii();
    data += QString("--" + bound + "\r\n").toAscii();
    data += "Content-Disposition: form-data; name=\"message\"\r\n\r\n";
    data += comment.toAscii();
    data += "\r\n";
    data += "\r\n";

    QNetworkRequest request(uploadUrl);
    request.setRawHeader(QByteArray("Content-Type"),
           QString("multipart/form-data; boundary=" + bound).toAscii());
    request.setRawHeader(QByteArray("Content-Length"),
          QString::number(data.length()).toAscii());
    mCurrentRequest = mNetManager.post(request,data);
    connect(mCurrentRequest,SIGNAL(finished()),this,SLOT(messageResponse()));
}
Yesterday I received my logitech wireless mouse and keyboard(MK220 Wireless Combo). I wanted to use it with my ubuntu laptop and was worried if it will be compatible with my ubuntu or not.
Before purchasing I tried to check logitech support site to verify it works with linux or not, but logitech site list support for only windows. But I still purchased it and hoping of it to work fine. But after receiving it, I plugged its wireless signal receiver to my laptop and inserted battery to keyboard and mouse and It worked, without my doing anything. Well I was thinking, I will be required do some hack to make it work, but I am glad that ubuntu has out of box support for this device.
After receiving it I tried to use keyboard, keyboard is lightweight and vary portable, initially I felt that its keys are cramped and my finger can't find keys that easily as it do on full size keyboard and also found its arrow Key are placed at awkward position and difficult to find it easily but after working a while on it now it quite comfortable.
Following are few snaps of product. I shared this post here in hope to remove similar doubts of compatibility that I had before purchasing this product.
Past few weeks I was working on my pet project. I thought to add one feature in this project and it required me to use camera and access its individual raw frame.
Accessing camera on harmattan platform is supported by using QCamera API, camera API is quite easy to use and I checked camera example application which works on n900.
After going through example application, I decided to use it in my application.
Creating camera and capturing image or video using QCamera is quite simple and straight forward. I did not faced any problem with it. But remember you need to request access from aegis framework for using camera, you can use following request for this purpose.
But when I decided to access raw image frame from camera, it did not proved so easy. N900 camera example does not work on N9 and need some changes.
I will try to list those changes and reason here.
To access individual camera frame from camera I decided to use MyVideoSurface class, you can find original source here.
But as I run the program on device, I noticed many camera related error in console and did not capture any valid camera image.
Error goes not like this.
CameraBin error: "Could not negotiate format"
Reason for this is QCamera on N9, return image in UVVY format, so we need to add this image(QVideoFrame::Format_UYVY) support in MyVideoSurface class.
But if you just add this support and dose not implement code to handle this format, you will face follwing error.
Failed to start video surface / CameraBin error: “Internal data flow error.”
Reason it you can not use QVideoFrame offered in present method call, to create QImage directly. You need to convert image from UYVY to RGB and then use those RGB data to create QImage.
QGraphicsVideoItem class in n900, has a fast implementation of this conversion. You can find its implementation here.
Now you should have a valid QImage that you can use for further processing. Here is my code for MyVideoSurface class after making above changes. This class is tested on N950 device.
MyVideoSurface::MyVideoSurface( QObject* parent)
    : QAbstractVideoSurface(parent)
{
}

bool MyVideoSurface::start(const QVideoSurfaceFormat &format)
{
    mVideoFormat = format;
    //start only if format is UYVY, i dont handle other format now
    if( format.pixelFormat() == QVideoFrame::Format_UYVY ){
        QAbstractVideoSurface::start(format);
        return true;
    } else {
        return false;
    }
}

bool MyVideoSurface::present(const QVideoFrame &frame)
{
    mFrame = frame;

    if (surfaceFormat().pixelFormat() != mFrame.pixelFormat() ||
            surfaceFormat().frameSize() != mFrame.size()) {
        qDebug() << "stop()";
        stop();
        return false;
    } else {
        //this is necessary to get valid data from frame
        mFrame.map(QAbstractVideoBuffer::ReadOnly);

#ifdef  __ARM_NEON__

        QImage lastImage( mFrame.size(), QImage::Format_RGB16);
        const uchar *src = mFrame.bits();
        uchar *dst = lastImage.bits();
        const int srcLineStep = mFrame.bytesPerLine();
        const int dstLineStep = lastImage.bytesPerLine();
        const int h = mFrame.height();
        const int w = mFrame.width();

        for (int y=0; y < h; y++) {
            //this function you can find in qgraphicsvideoitem_maemo5.cpp,
            //link is mentioned above
            uyvy422_to_rgb16_line_neon(dst, src, w);
            src += srcLineStep;
            dst += dstLineStep;
        }

        mLastFrame = QPixmap::fromImage(lastImage);
        //emit signal, other can handle it and do necessary processing
        emit frameUpdated(mLastFrame);

#endif
        mFrame.unmap();

        return true;
    }
}

QList MyVideoSurface::supportedPixelFormats(
            QAbstractVideoBuffer::HandleType handleType) const
{
    if (handleType == QAbstractVideoBuffer::NoHandle) {
        //add support for UYVY format
        return QList<QVideoFrame::PixelFormat>() <<  QVideoFrame::Format_UYVY;
    } else {
        return QList<QVideoFrame::PixelFormat>();
    }
}
And following is MyCamera class, that use above MyVideoSurface class to display individual frame. I derived this class from QDeclarativeItem, so I can use it in QML as well.
MyCamera::MyCamera( QDeclarativeItem * parent ) :
    QDeclarativeItem(parent),mCamera(0)
{
    startCapture();
    mPixmap = new QGraphicsPixmapItem(this);
}

MyCamera::~MyCamera(){
    stopCapture();
}

void MyCamera::stopCapture(){
    if( mCamera )
        mCamera->stop();
}

void MyCamera::startCapture()
{
    mCamera = new QCamera(this);
    //set Still image mode for image capture or Video for capturing video
    //mCamera->setCaptureMode(QCamera::CaptureStillImage);
    mCamera->setCaptureMode(QCamera::CaptureVideo);

    //set my surface, to get individual frame from camera
    mSurface = new MyVideoSurface();
    mCamera->setViewfinder(mSurface );

    connect(mSurface,SIGNAL(frameUpdated(QPixmap)),this,SLOT(frameUpdated(QPixmap)));

    //set up video capture setting
    QVideoEncoderSettings videoSetting;
    //videoSetting.setQuality((QtMultimediaKit::EncodingQuality)0); //low
    videoSetting.setResolution(QSize(848, 480));

    // Media recoder to capture video,use record () to capture video
    QMediaRecorder* videoRecorder = new QMediaRecorder(mCamera);
    videoRecorder->setEncodingSettings(videoRecorder->audioSettings(),videoSetting);

    //  set up image capture setting
    //QImageEncoderSettings imageSetting;
    //imageSetting.setQuality((QtMultimediaKit::EncodingQuality)0); //low
    //imageSetting.setResolution(QSize(320, 240));

    // Image capture to capture Image,use capture() to capture image
    //m_stillImageCapture = new QCameraImageCapture(mCamera,this);
    //m_stillImageCapture->setEncodingSettings(imageSetting);

    // Start camera
    if (mCamera->state() == QCamera::ActiveState) {
        mCamera->stop();
    }
    mCamera->start();
}

void MyCamera::frameUpdated(const QPixmap& pixmap) {
    mPixmap->setPixmap(pixmap);
}
I recently ported my Audiobook Reader app for symbian using symbian components. As there is no common QML based file dialog, I need to create my own.
I uploaded my implementation to Gitorious repository here. Currently this code works for only symbian as its used symbian components, but it can be easily ported to work on meego as well.
In this post I will try to explain how this file dialog can be used. Repository also include full working sample.
Lets start with main.cpp file. We need to create instance of FileModel and share it with QML and rest of code is to launch our mainl Qml file.
Now QML file which needs to use FileDialog, following code can be used. Here in openFile function, if you want to select Folder/Directory then dirMode should be set to true, if you want to select File than set it to false.
I recently ported my Audiobook Reader application to Symbian (supports Anna and Belle).
I struggled a lot while porting this to symbian. For example phonon has some problem with Qt 4.7 on symbian and I wested almost one day to find out solution. If you are also facing similar problem. Then visit this link and this.
Capturing volume key was another problem. I required to use native symbian remote control api to resolve this issue. Visit this link for more info.
And as I use ubuntu machine as development machine, debugging and compilation was another problem.
I recently received Nokia Lumia 800 from Nokia Launchpad program. Following are few unboxing snaps.
So far experiance is good, nice little box with accessory and phone cover.
Phone build quality is good and fealt solid while holding it.
I was not able to get beyound following screen, it stuck here and I was not able to boot phone. I can not understand if this screen meant to connect it to pc or it is asking for charging. I tried both but did not get success. Thus unboxing ends here and starts my struggle with my first windows phone.
Update: Now that I received replacement device, I was able to boot and use it for some time. Here are few snaps after power on. I used it only for some time, I prefer to use my meego device, but I liked this device a quite a lot, its animation is quite smooth and fluid. It's UI is quite refreshing and simple. App are lauhced in vary responsive manner and did not faced any hang. Office integration is good and I can easily access my skydrive account from it.
Thing I dont liked are, not able to upgrade it over the air, lack of mass storage, must use of zune( which is not availble for linux), and most dispressing I can not develop apps for it as tools are only for windows. Still device is good and I would like to try developing for it, someday when I have access to windows machine.


