Showing posts with label BlackBerry. Show all posts

Saturday, December 27, 2014

Showing Remote Image using ImageView in BB10 Cascades

While working on my BB10 App update, I required to show Remote Image using ImageView BB10 cascades API. ImageView or Image component by default does not support loading image from URL on internet. I implemented a custom component which serve the purpose and also easily integrated with ImageView.

Following is implementation for the same, I hope it will be useful to someone.

Let's start by showing how my custom component works. Following code shows how to use ImageDownloader custom component along with ImageView to display Grid of images from internet. Data Model contains two kind of URL, url for low resolution image and url for high resolution image.
import my.library 1.0

ListView {
  id: listView
  
  layout: GridListLayout {}
  dataModel: model;
  
  listItemComponents: [
      ListItemComponent {                        
          ImageView {
              id: imgView
              imageSource: "default_image.jpg"  
                                        
              attachedObjects: [
                  ImageDownloader {
                      id: imageLoader
                      url: ListItemData.mediumImage
                      onImageChanged: {                 
                          if (imageLoader.isVaid) {
                              imgView.image = imageLoader.image
                          }
                      }
                  }
              ]
          }
      }
  ]
}
ImageDownloader component is available in QML because we imported "my.library". We can make any C++ code available to QML by registering it to QML System, folloiwing snippet shows how we can register C++ component to QML system.

#include "ImageDownloader.h"

int main(int argc, char **argv) 
{
 Application app(argc, argv);

 qmlRegisterType<ImageDownloader>("my.library",1, 0, "ImageDownloader");

 QmlDocument *qml = QmlDocument::create("asset:///main.qml").parent(&app);

 AbstractPane *root = qml->createRootObject();
 app.setScene(root);

 return Application::exec();
}
Now that custom component is ready to be used with QML, let's see how its implemented. Below if header file for ImageDownloader class. We are defining few properties like url, image and isValid. By setting "url" we can initiate download of image, when "image" download is finished downloaded image can be accessed by using "image" property. We can check if image is valid or not by checking "isValid" property. we are also defining few signal like "urlChanged" and "imageChanged", which are emited when url is changed or image is downloaded. And we are using QNetworkAccessManager to download image from internet.
#ifndef IMAGEDOWNLOADER_H_
#define IMAGEDOWNLOADER_H_

#include 
#include 

class QNetworkAccessManager;

class ImageDownloader: public QObject
{
    Q_OBJECT
    Q_PROPERTY(QVariant image READ image NOTIFY imageChanged)
    Q_PROPERTY(QString url READ url WRITE setUrl NOTIFY urlChanged)
    Q_PROPERTY(bool isVaid READ isValid CONSTANT);
public:
    ImageDownloader( QObject* parent = 0);
    virtual ~ImageDownloader();

signals:
    void urlChanged();
    void imageChanged();

private slots:
    QString url() const;
    void setUrl( const QString& url);

    QVariant image() const;
    bool isValid() const;

    void startDownload();
    void onReplyFinished();

private:
    QNetworkAccessManager mNetManager;
    QString mImageUrl;
    bb::cascades::Image mImage;
    bool mIsValid;
};

#endif /* IMAGEDOWNLOADER_H_ */
Implementation is also quite simple, let's see how its implemented. On URL change, we are initiating the image download using QNetworkAccessManager. When download is finished, we are reading image data in to buffer and creating Image using BB10 Image API.
#include "ImageDownloader.h"

#include <QNetworkAccessManager>
#include <QNetworkRequest>
#include <QNetworkReply>

ImageDownloader::ImageDownloader(QObject* parent):
    QObject(parent), mIsValid(false) {}

ImageDownloader::~ImageDownloader() {}

QString ImageDownloader::url() const {
    return mImageUrl;
}

void ImageDownloader::setUrl( const QString& url)
{
    if(url != mImageUrl) {
        mImageUrl = url;
        mIsValid = false;
        mImage = bb::cascades::Image();
        emit urlChanged();
        emit imageChanged();
        startDownload();
    }
}

QVariant ImageDownloader::image() const {
    return QVariant::fromValue(mImage);
}

bool ImageDownloader::isValid() const {
    return mIsValid;
}

void ImageDownloader::startDownload() {
    QNetworkRequest request(mImageUrl);
    QNetworkReply* reply = mNetManager.get(request);
    connect(reply, SIGNAL(finished()), this, SLOT(onReplyFinished()));
}

void ImageDownloader::onReplyFinished() {
    QNetworkReply* reply = qobject_cast(sender());
    QString response;
    if (reply) {
        if (reply->error() == QNetworkReply::NoError) {
            const int available = reply->bytesAvailable();
            if (available > 0) {
                const QByteArray data(reply->readAll());
                mImage = bb::cascades::Image(data);
                mIsValid = true;
                emit imageChanged();
            }
        }
        reply->deleteLater();
    }
}
That's all we have to do to do display remote image in BB10, hope you liked it.

Saturday, June 28, 2014

Resolving Folder reading issue from SD Card in BB10

There was a tricky bug in Audiobook Reader BB10 version for quite a some time which I was trying to resolve. Issue was that, for some folder in SD card, I was not able to browse it using QDir Qt API or Posix API. Though API was showing the folder, but when I try to find out folder's content, it reports folder as empty.

This was causing serious usability issue with Audiobook Reader application, as user were not able to add book from SD card. I debugged it long and tried to use various approach to resolve the issue but could not find any satisfactory solution.

I read it somewhere it causes issue if SD card was formatted with PC software and issue is resolved if you format SD card with BB10 setting. But this also looks hassle to user.

Finally, I decided to see how directory structure looks like and what is folders permission using SSH to device. When I used linux command like ls and cd, I was able to see folder's content fine. And I decide to use those command to resolve directory browsing issue.

Following is my code, if someone else is also facing similar issue. First I am escaping special character in filepath, else linux command will not work. Then I am creating "ls" command with sorting and with output which list directory content in absolute file path. Once we have proper command I am using popen API to run command and then using IO api to read command's output.
QStringList BookListModel::getFileList(const QString& dir) {

 QString filePath(dir);
 filePath.replace(" ","\\ ");
 filePath.replace("'","\\'");
 filePath.replace("`","\\`");
 filePath.replace("!","\\!");
 filePath.replace("$","\\$");
 filePath.replace("&","\\&");
 filePath.replace("*","\\*");
 filePath.replace("\"","\\\"");
 filePath.replace("(","\\(");
 filePath.replace(")","\\)");
 filePath.replace("[","\\[");
 filePath.replace("]","\\]");

 qDebug() << filePath;
 QString cmd = QString("ls -1 %1/*").arg(filePath);
 qDebug() << cmd;

 QStringList files;
 char path[1035];
 FILE* fp = popen(cmd.toStdString().c_str(), "r");
 if (fp == NULL) {
  qDebug() << "Failed to run command";
  return files;
 }

 while (fgets(path, sizeof(path)-1, fp) != NULL) {
  QString file = QString(path).trimmed();
  QFileInfo fileInfo(file);
  if (fileInfo.isFile() && FileModel::isSupportedMedia(fileInfo.fileName()) ){
   files << file;
  }
 }

 qDebug() << files;

 pclose(fp);
}
That's all, hope it will be helpful to someone.

Thursday, June 26, 2014

Audiobook Reader for BB10 now got Built for Blackberry status

Recently I upgraded my Audiobook Reader application pro version for BB10.

This version contains many UI related changes and now it is more aligned to Blackberry design guideline and now it is also awarded Built for Blackberry status.

Apart form UI related changes, this version contains two major changes.

Now it Book auto pauses in case it detect phone call activity.

And there was a very critical bug in application which prevents book to be added from SD card. Though issue was related to BB10 OS, I found one work around and now adding books from SD card works as expected.

Full list of features in current version is as below.
  • Allows adding single file or whole folder with book audio data
  • Supports adding custom bookmark
  • Supports browsing mp3 chapter files and play selected mp3 chapter file
  • Supports chapter skip
  • Supports 2 min, 1 min, 30 sec skip option
  • Supports auto pause on call
  • Supports Play/Pause using HW buttons
  • Supports custom cover art download
  • Advance file browser
  • Supports sleep timer
  • Supports shuffle
  • and some more...
Following is demo for current version.


Hope you will like the updates.

Saturday, December 7, 2013

SteelSeries controller Controller Un-Boxing

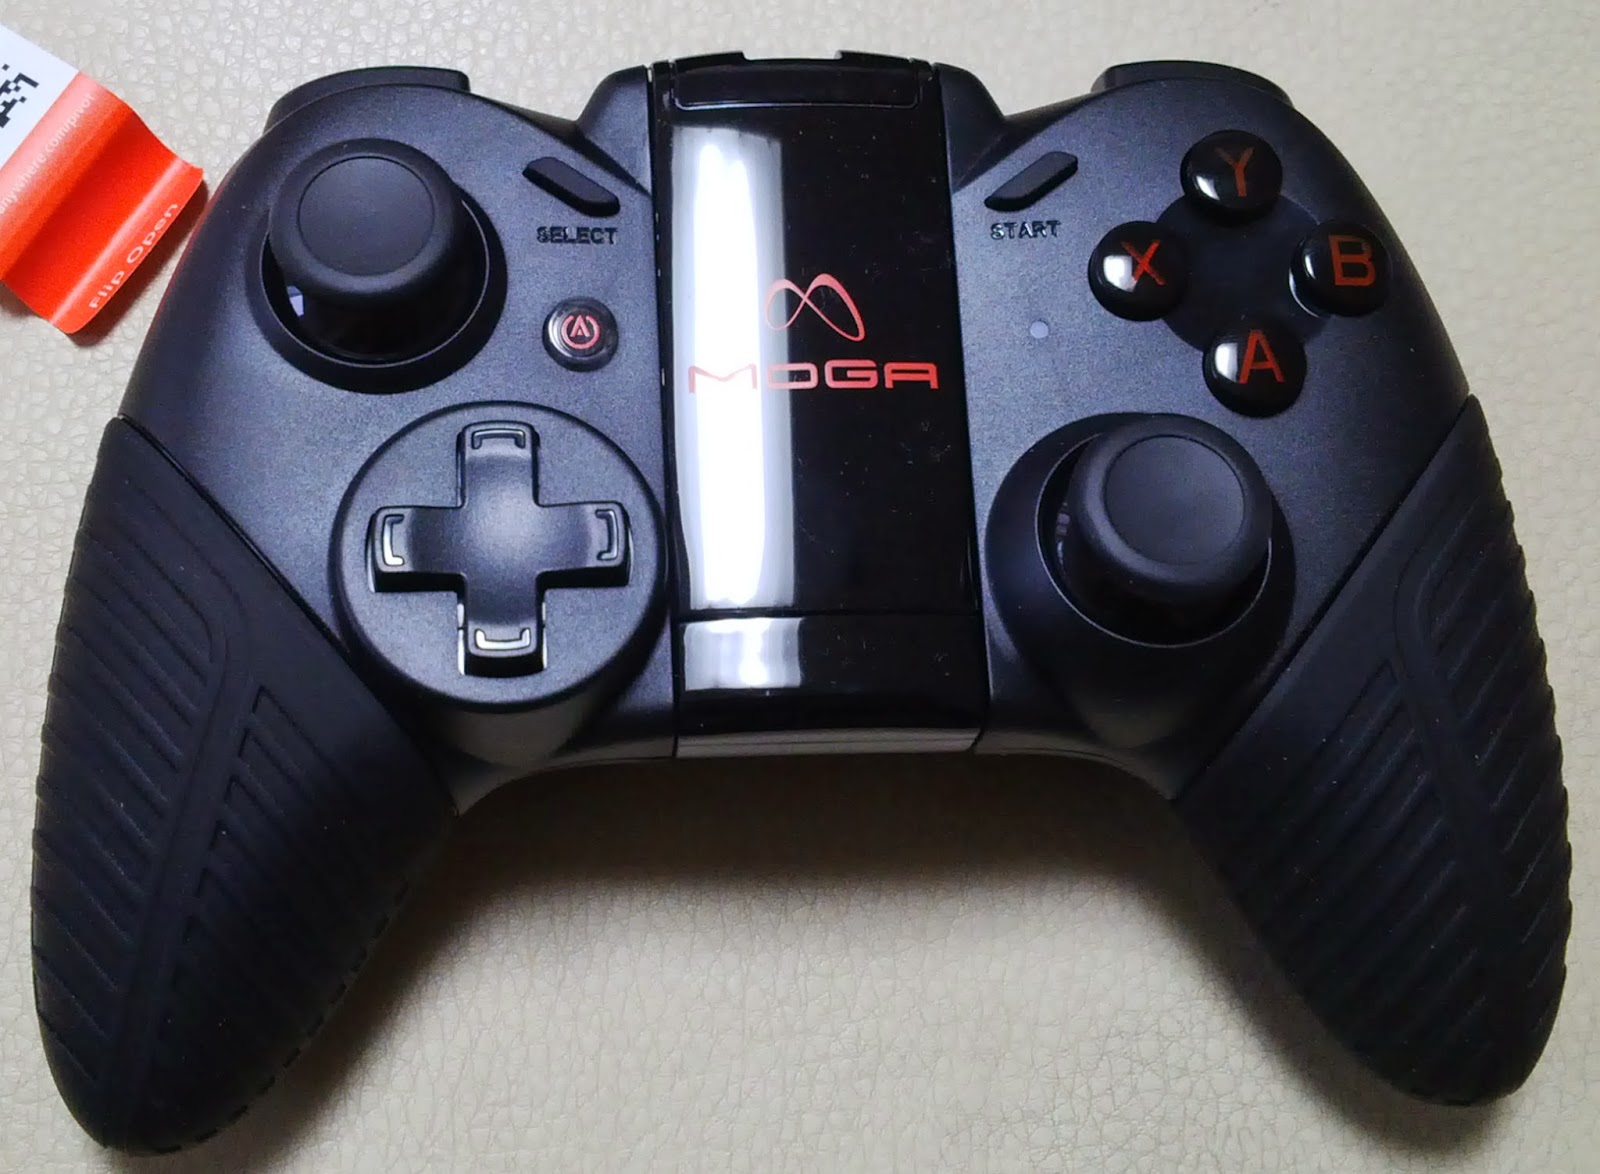
I also received SteelSeries controller along with MogaPro gontroller, from BlackBerry Gamepad offer. You can find MogaPro controller's unboxing here.

Following are few unboxing pics from SteelSeries controller.

Box in which it came.


Back side of box.

Front side of controller.

Came with a carry pouch and micro USB cable..

Looks quite small in my hand.

Close up of front side.

Only two button at backside.

Micro USB port.

MogaPro gamepad Un-Boxing

So I received my MogaPro gamepad tanks to BlackBerry GamePad promotion event. Here is un-boxing pictures for the same.

Box in which it came.

It came with micro USB cable to charge controller and a nice stand to place tablets.

The back side of controller.

Micro USB port to charge controller.

Front side.

Power on button and holder for Phones.

Sunday, December 1, 2013

BlackBerry gamepad offer

As you might know BB10 support gamepad, that mean you can connect gamepad to Device via Bluetooth and play games using it. And to promote gamepad enabled game, Blackberry also announced an offer. You can get more details about offer here.


For the same offer I got mine GamePad recently. I also enabled my CrazyFlight game to support GamePad. Here is demo.

Tuesday, July 23, 2013

Getting Size of control in BB10 Cascades API

I was working on update for my Audiobook Reader application for BB10. I wanted to create a custom control like shown below and I required to use AbsoluteLayout to create it.


In this case layouting needs to be done manually and to do that we need to consider width and height of the controls and position controls using those. But unlike Qt Quick, BB10 Cascades controls does not provide access to width, height and x,y properties.

However Cascades API offers LayoutUpdateHandler control, this control gets notification when layout is complete and with notification it offers actual location and size of control and it also store these values in it's layoutFrame property. I used that to find out size of control and did required layouting.

Following code shows how LayoutUpdateHandler can be used to find out size of control.
    Container {
        id: indicators
        layout: AbsoluteLayout {}
        
        touchPropagationMode: TouchPropagationMode.Full
        
        background: Color.DarkGray

        attachedObjects: [
            LayoutUpdateHandler {
                id: handler
            }
        ]

        property alias width: handler.layoutFrame.width;
        property alias height: handler.layoutFrame.height;
    }
Now you can use width and height property to know control's actual size.

Sunday, May 26, 2013

Converting APK to BAR and deploying it to BB10 device

As you might know BB10 device support Android application. But to install Android application on BB10, first you need to convert .apk file to .bar file.

I already have install BB10 NDK (Native Development Kit ), so I did not struggled with installing certificate file and setup the signer. BB10 NDK installer and IDE did that for me.

You will also need android sdk installed on your pc, before you begin. You can find detailed instruction here at BlackBerry Development site.

Following are few steps that I often use to convert APK to BAR file.

1) export ANDOID_HOME varible

export ANDROID_HOME=~/android_sdk/sdk/

2) Verify if APK file does not you unsupported APIs.

 ./apk2barVerifier ./ANDROID_APPLICATION.apk 

3) If your APK does not use unsupported APIs then you can go ahead and covert APK to BAR to test on your device.

./apk2bar ./ANDROID_APPLICATION.apk -d DEBUG_TOKEN_FILE 

4) Install BAR file to development device.

Following will deploy all BAR files under test folder to device.I find this method easier.

./batchbar-deploy ~/Desktop/test 169.254.0.1 DEVICE_DEVELOPMENT_PASSWORD

Or you can deply individual BAR file using following command.

 ./blackberry-deploy -installapp -package ./BAR_FILE.bar -device 169.254.0.1 -password DEVICE_DEVELOPMENT_PASSWORD

Once testing is done, you can use blackberry-signer command to sign BAR file and publish it on App World. But I did not tried it my self. I just wanted to install one android app on my BB10 and my device is always on development mode so I just used BAR files with Debug token.

Friday, May 3, 2013

Un-boxing BlackBerry Limited Edition Red Z10

Last week I received Limited Edition Red Z10 device. I was waiting for it for quite long time and finally received it last week.

Following are Un-boxing of the device. The box is quite different than box in which Dev Alpha device came.


Box came with a Device, an USB cable, Power adapters compatible with various countries' standard and a headphone.


Behind the battery there is slot for micro SIM and There is also slot for micro SD card, you don't need to remove battery to change micro SD card.


It has hardware button to control volume and play pause key in middle and on other side there are slots for micro USB and micro HDMI port.


Its take some time for complete boot up, once it boots up and initial set-up is complete it offers a introductory tutorial for its gestures based interface.

Sunday, February 3, 2013

Audiobook Reader for BlackBerry BB10

For past some time I was working on porting my Audiobook Reader application to BlackBerry BB10 platform.

Application is quite similar to Meego version, though there are few feature missing in BB10 which are available on Meego version. I thought I will work on that once I have some feedback from existing version. So if you have installed and have some feedback kindly provide those.

Application is available both as free version and paid version. Feature wise both version are same, only difference is free version is ad sponsored.

Here is live demo on BB10 dev alpha device.


Here are few snapshot of application for BB10.


Hope you will like the application.


Friday, January 4, 2013

Creating custom listview with BB10 Cascades API

As I indicated in my previous post, I am trying to port my Audiobook Reader application to BB10. I needed to make few changes to use BB10 Cascades API.

Previously I posted about how to create custom dialog box using Cascades QML API.

In this post I will talk about how to create custom list view.

For most case StandardListItem should be enough for use. Its looks like below.


But I wanted to learn creating custom component and also wanted to add some dynamic behavior to my list item.

I wanted to add Delete button on my list item. By default delete button is invisible, its get visible on long press event. It you tap on button the delete event is fired, touching anywhere else in item makes it invisible again. Also touching List item in normal state fire the selection event.

I was not sure how I can achieve this behavior with StandardListItem and I create my custom list item like below.

Normal condition, it looks like below.

On long press event on list item, it shows the delete button.

Now lets see how I created list item to satisfy above behavior.

First lets create list view, which uses the custom list item named ListDelegate and also have necessary function (selected and delete )to handle events from list item.
            ListView {
                id: listView
                dataModel: listModel.model
                listItemComponents: [
                    ListDelegate {
                    }
                ]

                //called by listdelegate manually
                function selected(index) {
                    console.log("###### Index selected:" + index);
                }

                //called by listdelegate manually
                function delete(index) {
                    console.log("###### Delete index:" + index);
                }
            }
Following is code for ListDelete component. I removed some code to keep code short and relevant.

First we need to set touchPropogationMode to Full on root container, so the all sub component get chance to handle their event. Then I added to sub container to main container to hold actual list item content and one to hold delete button and added gesture handler to both of them.

Unfortunately I was not able to find easy way to emit signal from ListItem to ListView, so I ended up calling ListView function manually to indicate select and delete event. By calling list view function
 root.ListItem.view.selected() and root.ListItem.view.delete()
.
To access current list items's index, we can use root.ListItem.indexPath property.
ListItemComponent {  
    
    Container{
        id: root
        layout: DockLayout {}
        touchPropagationMode: TouchPropagationMode.Full;
          
        Container{
            id: itemRoot
            layout: DockLayout {}
            preferredWidth: 768; preferredHeight: 120  
            
            gestureHandlers:[
                LongPressHandler {
                    onLongPressed: {
                        //make delete button visible
                        deleteBtn.opacity = 1;
                        itemRoot.opacity = 0.3 
                    }
                },
                TapHandler {
                    onTapped: {   
                        if( deleteBtn.opacity == 1 ) {   
                            //make delete button hide                
                            deleteBtn.opacity = 0;
                            itemRoot.opacity = 1; 
                        } else {
                            //fire selected event
                            root.ListItem.view.selected(root.ListItem.indexPath); 
                        }
                    }
                }
            ]  
                        
            Divider {
                verticalAlignment: VerticalAlignment.Bottom
                horizontalAlignment: HorizontalAlignment.Center  
            }
            
            Container {
                
                verticalAlignment: VerticalAlignment.Center
                layout:StackLayout {
                    orientation: LayoutOrientation.LeftToRight;                
                }
                                
                ImageView{
                    id: image
                    preferredHeight: 110; preferredWidth: 110
                    imageSource: ListItemData.image;
                    verticalAlignment: VerticalAlignment.Center
                }
                
                Container {             
                    layout:StackLayout {}
                    bottomPadding: 10
                    Label{
                        text: ListItemData.title;            
                    }
                    
                    Label{
                        text: ListItemData.subTitle;                            
                    } 
                }
            }
        
        } 
        
        Container {
            id: deleteBtn
            
            opacity: 0; preferredWidth: 150; preferredHeight: 100
            verticalAlignment: VerticalAlignment.Center
            horizontalAlignment: HorizontalAlignment.Right  
          
            ImageView{
                imageSource: "delete.png";
                verticalAlignment: VerticalAlignment.Center
                horizontalAlignment: HorizontalAlignment.Center
            } 
            
            gestureHandlers:[
                TapHandler {
                    onTapped: {                              
                        if( deleteBtn.opacity == 1 ) {                    
                            deleteBtn.opacity = 0;
                            itemRoot.opacity = 1;
                            root.ListItem.view.delete(root.ListItem.indexPath); 
                        } 
                    }
                }
            ]           
        }
    }
}
Thought it seems lot of code, its quite easy to create custom list item. Now lets see how we can provide data to ListView. For my case I created Data model in C++ and exported it to QML. You can export c++ Data model to QML using setContextProperty. listModel is instance of class derived from QObject.

  QmlDocument *qml = QmlDocument::create("asset:///main.qml").parent(&app);
  ListModel listModel;
 qml->setContextProperty("listModel", &listModel);
We are setting model to list view like dataModel: listModel.model, it means that listModel has property called model. Following is code from the same.

class ListModel : public QObject
{
    Q_OBJECT
    Q_PROPERTY(bb::cascades::DataModel* model READ model);

public:
    void loadData();
    bb::cascades::DataModel* model(return mListModel;);
private:

    QMapListDataModel* mListModel;
};
And I am populating the ListModel like below. I am packaging my List ItemData inside QVariantMap, so that ListItem can easily access the data.

void ListModel::loadData()
{
    mListModel->clear();

    foreach( ... )
    {
  QVariantMap map;
 map["image"] = "image path";
 map["title"] = "title";
 map["subtitle"] = "subtitle";
 (*mListModel) << map;
   }
}
If you see ListItem's code, We can access the list item data like below.
                ImageView{
                    imageSource: ListItemData.image;
                }
                
                Container {             
                    Label{
                        text: ListItemData.title;
                    }            
                    Label{
                        text: ListItemData.subTitle;                            
                    } 
                }
Now finally its done. I hope it will be helpful to someone.

Thursday, December 27, 2012

Unboxing BlackBerry Dev Alpha B device

As I mentioned in my last port, I received Dev Alpha B device as part of Port-A-Thon event from BlackBerry.

Here is unboxing snaps of Dev Alpha B device.


Device has hardware key to capture photo, increase decrease volume. Other side there is micro USB connection for data transfer and charging. It also support mico HDMI for TV Out.


On top there is Power button and Audion jack.


In box, it comes with Battery, USB port and charger.


Inside there is slot for micro SD card and SIM card.


And that's it, It also boots fine.