While creating game, we usually need to create and destroy object dynamically. Well with Unity3D its easy to create and destroy object dynamically but we need to perform few step carefully before we are able to do so.
First to be able to create a object dynamically we need to create a proper object with material applied over it.
Lets create a object which we need to create dynamically. I want to create an egg when I press some button, lets start with that.
- import image for egg sprite

- create materiel from egg sprite


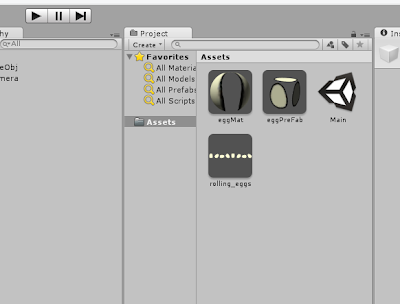
- create a object with egg material applied over it


Now we have object that we need to create dynamically. But to create object dynamically we need to create a Prefab and apply object to that prefab.
- Create a Prefab


- Apply object to prefab
Now we have prefab so we don't need that object any more, we can delete it so its not visible in scene anymore.
We are now ready to create object, but we need creation script. We can create a empty game object and attach creation script to it. But in this post, I am going to create a button object ( a Chicken), and when I click that button object I will create and destroy the prefab.
So let's create a script and attach it to button object.


Following is script, which create and destroy object. We need to make eggPreFab variable a Public variable so its visible outside and we can assign prefab from Unity3D interface.
Now we are almost done, but we need to assign prefab object to eggPreFab variable. To do so click button object, on script section you will see eggPreFab varible. Drop our egg prefab from asset section on this variable.

We are done, try running game. You should be able to create and destroy object now.
First to be able to create a object dynamically we need to create a proper object with material applied over it.
Lets create a object which we need to create dynamically. I want to create an egg when I press some button, lets start with that.
- import image for egg sprite

- create materiel from egg sprite


- create a object with egg material applied over it


Now we have object that we need to create dynamically. But to create object dynamically we need to create a Prefab and apply object to that prefab.
- Create a Prefab


- Apply object to prefab

Now we have prefab so we don't need that object any more, we can delete it so its not visible in scene anymore.
We are now ready to create object, but we need creation script. We can create a empty game object and attach creation script to it. But in this post, I am going to create a button object ( a Chicken), and when I click that button object I will create and destroy the prefab.
So let's create a script and attach it to button object.


Following is script, which create and destroy object. We need to make eggPreFab variable a Public variable so its visible outside and we can assign prefab from Unity3D interface.
using UnityEngine;
using System.Collections;

public class creation : MonoBehaviour {

 // Use this for initialization
 public GameObject eggPreFab;
 Object eggInstace = null;

 void Start () {
 }

 // Update is called once per frame
 void Update () {
  if( Input.anyKeyDown ){
   if( eggInstace == null )
    eggInstace = Instantiate(eggPreFab);
   else
    Destroy(eggInstace);
  }
 }
}
Now we are almost done, but we need to assign prefab object to eggPreFab variable. To do so click button object, on script section you will see eggPreFab varible. Drop our egg prefab from asset section on this variable.

We are done, try running game. You should be able to create and destroy object now.


