I created a small demo application to demonstrate how Animation can be done using Animator and State Machine with Unity5. This demo creates a Blinking Animation on Mouse click.
Following is final output of this demo.
Below post shows, how above animation can be created.
-> To begin, First create a simple cube and apply a material on the cube. Setup should look like below.

-> Then using "Add Component", add Animator to this cube.

-> Once Animator is added, open Animation window using "Window" -> "Animation", We will need to use while performing the animation.

Animator performs animation using State Machine and this state machine should have default state. Animator will transit to this default State when object is created. In Animator, Animation clip is considered as a State, so lets add a Animation clip and name it default.

-> Our default state will not have any animation, it should show just initial color. Let's just add one frame with current color. Like below.

-> Now we have default state, let's add another state which will perform "Blinking" animation.

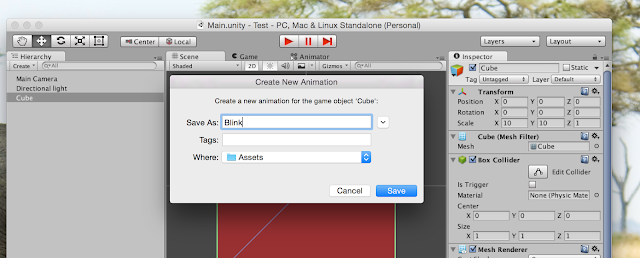
-> Now we should add frames, so let's add color property and frames to animate color.


After adding these frames color should animate like below.
-> Now we have Blinking animation state, we are now ready to create a State Machine. Open Animator window by clicking on "Animator" object, it should look like below.

-> We should now add a Parameter which will be used to Trigger animation. On "Animator" window add new boolean parameter and name it "blink".


Following video shows how to create transition and how to add condition to those transition.
-> Now we have state machine with transition and condition, but we want Blink Animation to terminate once its finished. Let's open "Blink Animation" and add Animation event line shown in below image.

This will prompt you to select function to be invoked when Animation frame is reached. You can select function from attached Script.

Following video shows the same process.
-> Finally, We also need to add a script to Cube object. Following is code for the script. In script we are setting "blink" transition parameter of Animator to true on mouse click. While StopAnimation sets "blink" parameter to false when animation event is called.
And now if run project and click cube, you should see blink animation as per demo video. That's it hope this post will be helpful.
Following is final output of this demo.
Below post shows, how above animation can be created.
-> To begin, First create a simple cube and apply a material on the cube. Setup should look like below.

-> Then using "Add Component", add Animator to this cube.

-> Once Animator is added, open Animation window using "Window" -> "Animation", We will need to use while performing the animation.

Animator performs animation using State Machine and this state machine should have default state. Animator will transit to this default State when object is created. In Animator, Animation clip is considered as a State, so lets add a Animation clip and name it default.


-> Now we have default state, let's add another state which will perform "Blinking" animation.


-> Now we should add frames, so let's add color property and frames to animate color.


After adding these frames color should animate like below.
-> Now we have Blinking animation state, we are now ready to create a State Machine. Open Animator window by clicking on "Animator" object, it should look like below.

-> We should now add a Parameter which will be used to Trigger animation. On "Animator" window add new boolean parameter and name it "blink".


Following video shows how to create transition and how to add condition to those transition.
-> Now we have state machine with transition and condition, but we want Blink Animation to terminate once its finished. Let's open "Blink Animation" and add Animation event line shown in below image.

This will prompt you to select function to be invoked when Animation frame is reached. You can select function from attached Script.

Following video shows the same process.
-> Finally, We also need to add a script to Cube object. Following is code for the script. In script we are setting "blink" transition parameter of Animator to true on mouse click. While StopAnimation sets "blink" parameter to false when animation event is called.
using UnityEngine;
using System.Collections;

public class MyAnimation : MonoBehaviour {

 private Animator animator;

 void Awake() {
  animator = GetComponent ();
 }

 void OnMouseUp() {
  startAnimation ();
 }

 public void startAnimation() {
  animator.SetBool ("Blink", true);
 }

 public void stopAnimation() {
  animator.SetBool ("Blink", false);
 }
}
And now if run project and click cube, you should see blink animation as per demo video. That's it hope this post will be helpful.
